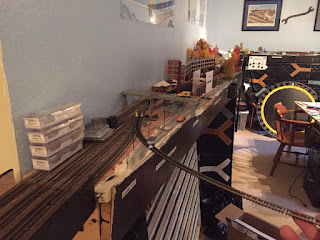
Option 1:
Get rid of the drop leaf LaSalle Yard. Have the mainline hook a left after crossing under the highway bridge to the left of Peru Power. Open up to a new 8ft x up to 18" section that would replace the wall mounted TV cabinet now. This would be the new Bureau Junction compressed without the turn back portion of the wye. This would allow for plenty of storage on the Silvis and Peoria storage tracks modeling the moving of freight down both lines (served by #113 Joliet to Bureau Junction local transfer train).
Option 2:
Keep the drop leaf section (former LaSalle yard) as it. Extend the mainline down the two left tracks of the drop leaf yard representing traffic bound for Silvis. Utilize the other one track as Silvis storage track for Bureau Junction. Create Bureau Junction just to the left of Peru Power. Keep the Peoria Storage track on the new lift out (but most likely a new drop leaf section). Model Peoria on the new 8ft by 18" section of layout.
Option 3:
A combination of Options 1 and 2. Model Bureau Junction just to the left of Peru Power. Use the far two left tracks of the old drop leaf section to represent the mainline to Silvis. Use the two right tracks of the old drop leaf section as the Peoria and Silvis storage tracks at Bureau Junction. Unsure if the wye would fit on the new drop leaf section. It might have tracks indicating a wye is there, but not actually connect. Model Peoria Yard and a few industries using building flats on the new 8ft by 15" section. I would want to model Pabst Brewery for sure, but possibly others depending on what I can squeeze in there.
Also, I had originally thought about adding a yard track at Utica, but when typing this up, I thought maybe I could base the Utica local out of Bureau Junction. Have them depart there, work up to Utica and return.
A new job would be created to work the industries in Peoria as well as sort out the freight for interchange. I would try to model the Peoria and Pekin Union Railway interchange.
Option 4:
Much like option 3, but more detailed drawing of what would occur. The track plan I created matches very closely to the prototype. Although it doesn't look like it on the drawing, all the curves and transitions for the junction seem to be fine when I laid it out last night.
My drawing of the junction this morning.
The actual Bureau Junction station map with the routes I'm modeling highlighted in red.
The Peoria Branch of Bureau Junction starting at the end of the existing switch at the former LaSalle Yard.
The new Bureau Junction showing the two mainline tracks on the left of the station, Peoria Branch main track and then the Peoria Storage track on the far right.
In Peoria, I have come up with a plan to model the southernmost end of the Peoria Branch at Iowa Junction where the Rock interchanges with the Burlington Northern, Toledo Peoria & Western, and the Peoria Pekin and Union Railway.
Here is a map showing the railroads in Peoria. For a smaller city, it is amazing how many railroads intersect here. The RI comes in from the northeast. I would model Iowa Junction which is southwest from Bridge Junction where the Peoria & Pekin Union (P&PU) crosses the Illinois River. I would interchange cars from the Rock Island to the Toledo, Peoria & Western (TP&W), Burlington Northern (BN) and P&PU. It would make for an interesting switching puzzle.
Peoria Plan
Speaking of donuts, I was looking at some of the other station maps. I don't feel I'm doing a bad job modeling close to the prototype. Definitely more compressed than I would want it to be, but its close.
Ottawa Yard. I model five of the eleven yard tracks and main yard features. I didn't have the room to model the industry on the northside of the yard. I chose to model a farm scene instead.
I was able to model a lot of both Ottawa Silica and Libby-Owens Ford surprisingly enough. I'm very pleased how that turned out.
Utica is pretty close for the main section between Belrose Silica and PQ. I need to add a yard track there which I plan to do with the changes going on at Bureau Junction.
Quick recap of Operations:
This is how I think the operations would play out.
Operation 1 - Work Ottawa Yard as normal
Operator 2 - Work Ottawa Switcher (OTSW), but split into two shifts (morning and afternoon). Switch with Operator #4 on second shift.
Operator 3 - Work #11/#12 Peoria Rocket. Starts in Peoria, makes stops at Peoria, Bureau Junction, Utica, terminates in East Staging (Ottawa).
Also works Utica Switcher (UTSW) as normal, but originating at the newly created yard at Utica.
Operator 4 - Operate #130 Peoria Switcher (split into two shifts - morning and afternoon). Work interchange traffic. Travel up to Bureau Junction (pickup black, yellow, green tabs / drop off orange, blue, white, Soo tabs).
Also, operate the Soo Local which originates on the Silvis main and travels to Ottawa to work and returns.
Operator 5 - Operate #113 Joliet to Bureau Turn - Originate at East Staging. Work Ottawa Yard (drop Soo, White tabs - pickup gray, yellow, black, orange and green tabs). Work Utica - drop gray tabs / pickup yellow, black, orange and green tabs. Travel to Bureau Junction - drop yellow, black, orange and green tabs / pickup white, Soo, blue tabs). Work Utica a second time. Pickup white, Soo and blue tabs. Work Ottawa Yard a second time on the trip back - drop white, Soo tabs / pickup blue tabs). Terminate at East Staging.
Operate possible train #95 Blue Island to Peoria Merchandise freight.
Goals
So, this is what I need to accomplish in the next 16 days. One of my A Team operators Larry believes I can do it. He may be hitting the crack pipe, but I will give it my best try!
Tear down old TV cabinet off wall- Construct
new Peoria Sectionand Lift Out piece - Lay Track
- Wire up and install all new Caboose Ground Throws for new Section
- Install new Sand Cleanout Track
- Install Tortoise Switch Machines at Crossover in East Ottawa Yard
- Repair three broken turnout points on old turnouts.
- Stage Layout
- Clean Track
- Clean Locomotives
Tonight, I came home on a mission. I removed the old black cabinet. Rummaged around in the garage and found some plywood. It was 30 3/4" by 48". Perfect. I needed 8 ft long. Ripped that 3/4 plywood in half and mounted to the wall with shelf brackets. Added a fascia that I picked up at Lowes. Everything is level and ready to go. Also, I ripped out the fascia where I the east leg of the wye will blast across the road crossing near Peru Power.
I laid out some cork to get an idea of my track plan. It appears it will work with a little modification. Total estimated car spots are 47 between the four railroads to interchange. This will be an interested switching job for somebody. :-)
Next, I will need to work on the drop leaf section for the junction. I need to place an order for turnouts. I'm super excited as this is turning out better than I could have imagined. I can't wait to get the actual junction in place. Things are bustling over here at the ROCK!


