This evening, I completed wiring up the signal control board for Utica. See photos below.
The board with all the wire connections.
The Utica Panel Signal Control Panel.
We have lights!
A side profile of the BLMA Double Track Signal Bridge.
Clear signal, track one!
It's really hard photographing these LEDs.
Stop signal at Utica.
Clear signal, Utica.
I decided to change up the signals some. Below are updated control board diagrams with notations.
Utica Signal Board - A dummy signal will be placed at East Utica as you can't see the signal too well with out bellying up to the layout and knocking down half of Ottawa Yard. The control board will have the rotary switches installed in case this changes in the future.
West Ottawa Board - In the future, a crossover will be added with signal on the mainline at West Ottawa. I updated the board to include it, although it might be a while before it is installed.
East Ottawa Board - I added the second Arrival/Departure track to the diagram and appropriate signals. The dummy signal westbound on the right side of the CB&Q will not be used (moving to Utica). I added a dwarf signal for inbound into the yard. Crews will need to request the signal into the yard when ready to return.
Progress has been really infrequent lately. May is a busy month for us as school winds down and the summer activities ramp up.
Monday morning, I drilled the holes and placed the signals in place. This evening, I worked on wiring up two of the signal heads for Track #2 Eastbound at Utica. I added 22 gauge wire to the micro wires from the signal heads, ran wires to my homemade signal controller board, and then to the rotary switch. Everything worked perfectly. I'm very excited to see the signal lit. Now, to finish wiring up the remaining signal heads and mounting the panel.
I'll post photos once I have the signal bridge in place and all heads lit.
Sorry, it has been so long since I have posted anything. I had been working on a weathering project using oils, but the first car didn't turn out well. I need to try again on another car. I will post examples and how I did it once I successfully complete one. I was somewhat disappointed by the first car, but I have learned with this hobby, you make mistakes. I'm looking forward to trying again.
Meanwhile, I received my signals from Custom Signal Systems. He assembled the two BLMA Double Track Bridge kits, painted and installed the heads.
Testing of the signals was a breeze as all the micro wires were pre-tinned, color-coded, correct resistor installed, and ready to go. Also, the wires were safely routed down tubing to prevent any chafing of the micro insulation creating a short. I have been much more pleased with Custom Signal Systems than my experience with BeNScale signals.
I had researched various ways to control the signals. To do any sort of detection would be very expensive. With the size of my layout, it would simply be overkill. I just want to control the signals manually to add some realism to the operations. It was suggested to create a simple circuit board to control the signals. Custom Signal Systems offered to build me one (which I appreciate), but wanted a $100 the two boards required to control the signals at Utica. I wanted to save money, so I researched on how I could do it myself. I figured it couldn't be too hard. I found some videos on YouTube that helped with the basics. I felt I was ready and started creating a list of components required.
Btw, this guy has some great videos on the subject.
I found that the parts to be inexpensive and it would simply take a little time. Probably a little more than expected since I have never done any circuit board-type work previously, but still worth it as I would learn a new skill.
So, I went down to my local Radio Shack. Between there and Amazon, I was able to find the components I needed.
- 2 3/4" by 3 3/4" Perf Board
- Pack of 25 1A Rectifier Diodes (this will only allow current to flow only one way).
- 2 Pole 5mm Screw Terminal Blocks
- 22 Gauge solid core wire
Here is my control board for Utica using 6 stop rotary switches (only 4 stops will be used). It is printed out on paper and then applied to the back of 8x10 plexiglass (found at Home Depot). The rotary switches are installed on the plexiglass.
Here is a schematic of how it needs to function.
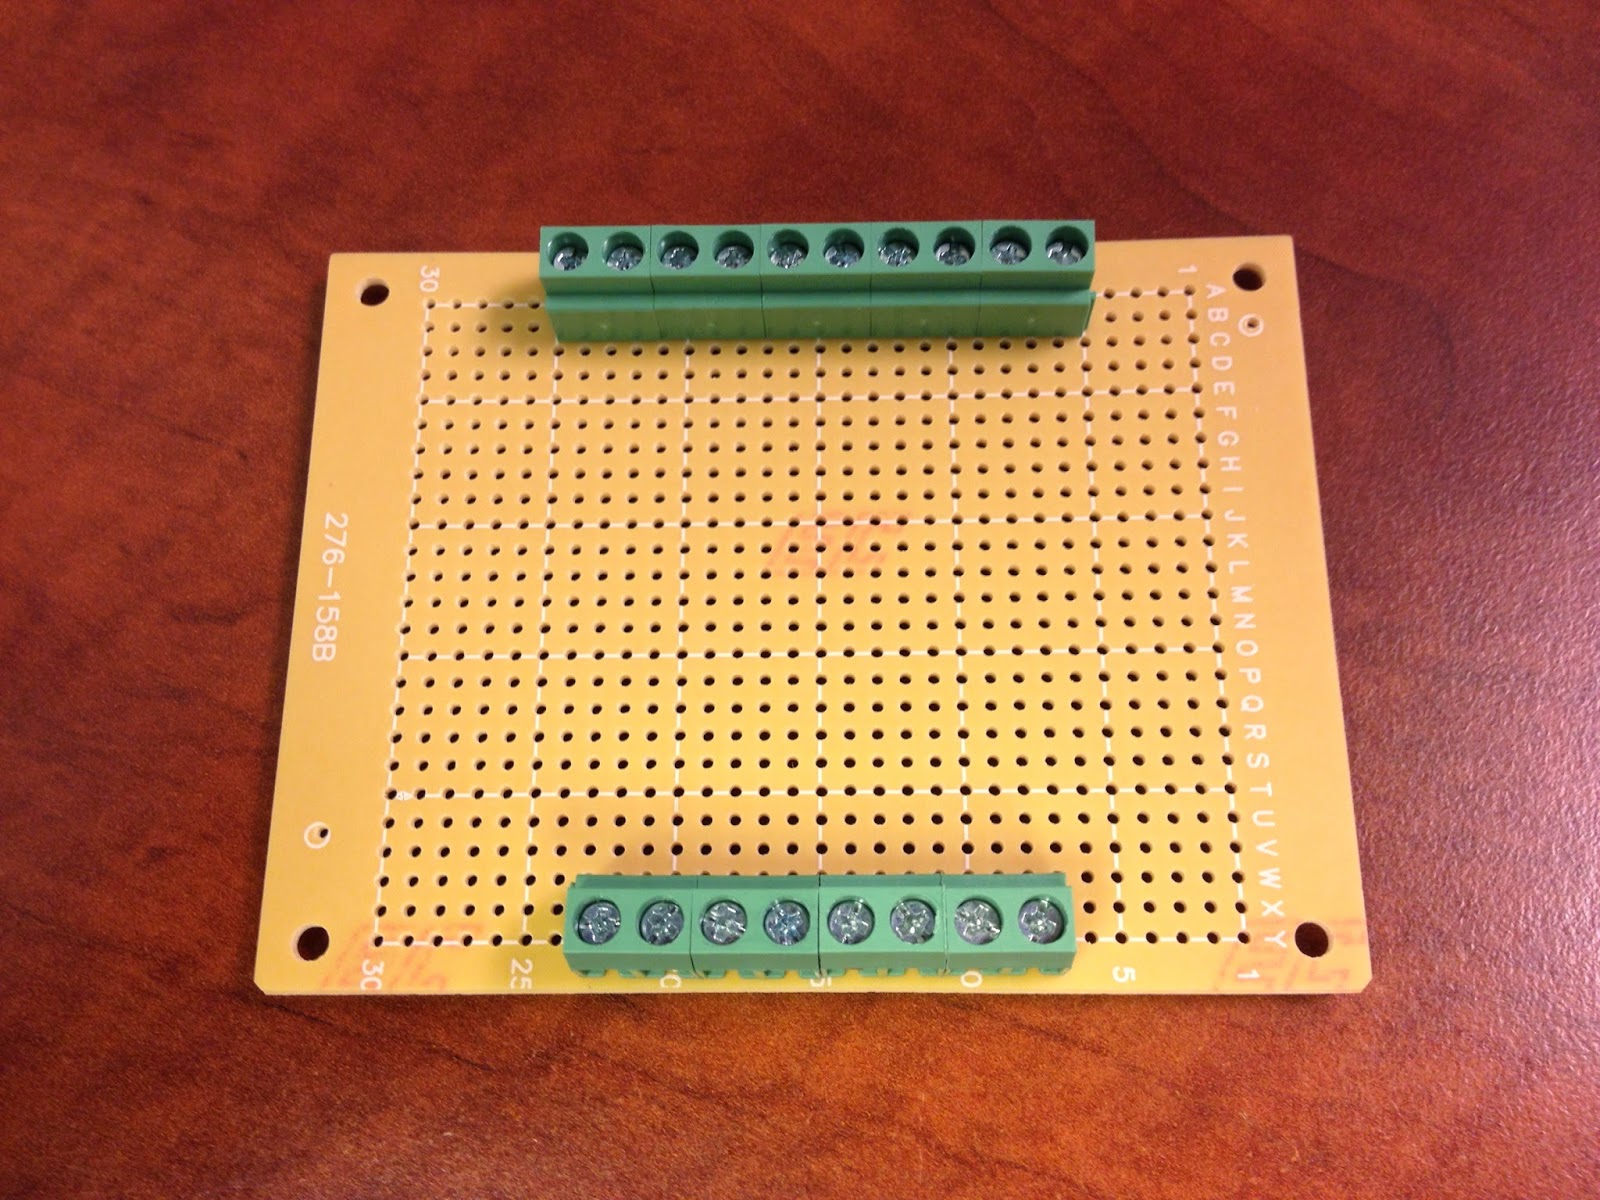
I installed the terminal blocks on the board. The bottom is the inputs from the rotary switches.
The top is the output to the signal head wire leads.
I added the diodes to the board.
Here is a view of the underside of the board.
Another view of the underside of the board showing the terminal posts.
Added the jumper wires between the diodes.
The final picture from the underside. I got a little sloppy with the red wire on the right. At the time though, we were dealing with some girl drama in the house, so I'm really not surprised. :-)
This evening, I soldered everything up and tested. I had one loose alligator clip (not anything wrong with the board) and then one loose connection that just needed a touch of solder. Otherwise, it works just as designed. I'm beyond ecstatic that I was able to pull this off. It isn't a complex board, but I made it. I'm proud!
This project made me feel all nerdy and I liked it! It was fun learning something new. Now, I wonder what else I can create on a perf board. I have already been looking into Arduino to find that I can control boards like this with an iPhone! Neat stuff! I would have to join forces with my friend Michael to get the programming straight, but between the two of us I'm confident we could pull it off.
Tonight, I was short on time. I repaired three turnouts that had broken points. That was pretty quick and painless.
I then completed the construction of one of the tank car loading platforms. I have two others to construct. These TrainCar kits are pretty nice and not too bad to build. I will paint all three black when I'm done.
This evening, I worked TrainCat tank car loading platform kit some more. Slowly, but surely, I'm making progress with it.
I have also been pondering how to add staging on the west end at LaSalle. Surveyed the site to see what might be feasible. A couple of ideas have been kicked around, but no definitive solution has been found yet.
Not much progress this weekend. Saturday, I spent all day operating at my friend Marcus' Charleston, Roanoke and Eastern Railroad layout. Saturday night, I added a few cross braces on the oil platform.
I surveyed the area where I plan on adding a crossover from Track 5 to Track 4. The way my yard is setup due to space restrictions, only Track 5 (A/D) track had access to the Ottawa Silica/LOF lead track. When that local is long departing the yard, the rear of the train would be hanging out on the mainline. Adding the crossover will allow the local to double back on Track 4 to pick up it's outbound cars on two tracks.
I need to survey the route of the throw rod from the Caboose Industries ground throw. It will have to run under the existing tracks to throw the turnout.
Thanks to Greg in Texas for constructing the pair of turnouts for me. It's greatly appreciated!